
If you've ever popped the bonnet, pulled the dipstick, and squinted at it wondering whether that colour means anything, this one's for you.
Engine oil is the one fluid in your car that quietly decides how long the engine lasts. Get the timing right, and you buy years. Get it wrong, and you pay for it in a rebuild.
A car engine oil change is not complicated. It's drain, filter change, refill, and check. The hard part is knowing when, because the answer depends on the oil in your sump more than the badge on your bonnet. Add Indian conditions, 45°C summers, 20-minute crawls to cover 6 km, and the manufacturer's number in the manual is a starting point, not the whole story.
So, if this sounds like something you’re dealing with, here’s how this blog can help you:
- Learn how to read your real interval
- The signs your car is already telling you
- The full step-by-step DIY process for a Car Engine Oil Change
- The mistakes that ruin an otherwise clean job
- Lastly, an honest look at when the garage is the better call.
When to Change Your Car's Engine Oil
Three things decide your real car engine oil change time: the grade of oil in the sump, how you drive, and what your manual specifies. In that order of practical impact.
Oil grade sets the outer limit. Mineral oil breaks down fastest; full-synthetic holds up longest. Driving pattern then pulls that limit inward; a car doing 8 km of stop-start twice a day is working its oil harder per kilometre than one doing 40 km of open highway.
Why Regular Oil Changes Matter
Engine oil coats every moving part, carries heat away, and holds contaminants in suspension so they don't settle on metal surfaces. Over time it loses the ability to do all three.
What you actually get from a timely change
- Better fuel economy Fresh oil has lower internal friction, so the engine loses less energy overcoming it.
- Longer engine life. Consistent oil film means less metal-to-metal contact on bearings, cams, and cylinder walls.
- Lower maintenance bills. Sludge and deposit buildup is what turns a ₹1,500 service into a top-end job.
- Cleaner emissions. Degraded oil burns off past worn seals and loads up the after-treatment system. This matters more on BS-VI engines; see why BS-VI engines need dedicated engine oils.
- Consistent performance. Throttle response and smoothness both drop off as oil degrades. You stop noticing it because it happens slowly.
Did you know? Engine oil degrades from oxidation and moisture even in a car that barely gets driven. A vehicle parked for eight months still needs an oil change before you trust it on a long run.
How Often to Change It, by Oil Grade
Most manufacturers specify somewhere between 5,000 km and 15,000 km. The spread comes almost entirely from oil grade.
| Mineral | Semi-synthetic | Full-synthetic |
|---|---|---|
| 5,000 – 7,500 km | 7,500 – 10,000 km | 10,000 – 15,000 km |
What shortens your car engine oil change interval
- Daily runs under 8 km, where the engine doesn't fully warm up
- Sustained stop-and-go traffic
- Ambient temperatures above 40°C
- Dusty or unsealed roads
- Towing, roof loads, or consistently full passenger loads
If two or more of these describe your driving, work to the lower end of your grade's range.
Choosing the Right Oil: Mineral vs Semi-Synthetic vs Full-Synthetic
Start with your manual. It gives a viscosity grade - 5W-30, 10W-40, 0W-20, and that's non-negotiable. The first number is cold-flow behaviour, the second is viscosity at operating temperature. Both are set by SAE J300. Use a grade your engine wasn't designed for, and you either starve it at cold start or lose film strength when hot.
Once you have the grade, the base oil type is your choice.
| Mineral | Semi-Synthetic | Full-Synthetic | |
|---|---|---|---|
| Best for | Older engines, budget running | Daily city driving | High mileage, highway, sustained heat |
| Change interval | 5,000–7,500 km | 7,500–10,000 km | 10,000–15,000 km |
| Cold-start protection | Lowest | Moderate | Highest |
| Oxidation resistance | Lowest | Moderate | Highest |
| Price | Lowest | Mid | Highest |
Longer drain intervals mean fewer changes, which offsets a chunk of the higher price on full-synthetic. Run the maths on your annual kilometres before assuming mineral is cheaper.
Tools and Materials You'll Need
- Fresh car engine oil - correct grade and quantity per your manual
- New oil filter, matched to your car's make, model, and engine variant
- Oil drain pan, capacity greater than your engine's oil volume
- Funnel
- Socket wrench with the correct socket for your drain plug
- Oil filter wrench
- New drain plug washer or crush gasket
- Jack and two jack stands
- Rags or shop towels
- Disposable gloves and safety goggles
- Sealable container for the used oil
Safety Precautions Before You Start

- Park on level, solid ground. Engine off, parking brake engaged, wheels chocked.
- Never work under a car supported only by a jack. A hydraulic jack can bleed down or shift. Always transfer the load onto jack stands and give the car a firm shove to confirm it's stable before any part of you goes underneath.
- Let the engine cool for 30 minutes. Hot oil causes contact burns and the drain plug will be too hot to grip.
- Wear gloves and goggles. Oil drains out forcefully and can reach your face.
- Lift only at the manufacturer's marked lifting points. Anywhere else deforms the floor pan or sill.
- Locate the drain plug and the oil filter before you go under. Identify them from above where possible.
- Keep a fire extinguisher within reach if you're working near a hot exhaust.
Step-by-Step Process on How to Change Engine Oil in a Car (DIY)
Let’s quickly dive into the Nine steps, roughly 45 minutes once you've done it before. Work in order.
Step 1: Prepare Your Workspace
Park on flat, solid ground and switch off the engine. Let it cool for 20–30 minutes. Keep fresh oil, a new filter and washer, socket and filter wrenches, a drain pan, funnel, gloves, goggles and rags ready. Check your manual for the correct oil grade and capacity.
Step 2: Lift the Vehicle
Use the manufacturer's marked lifting points to raise the car. Place jack stands under the designated support points and lower the car onto them. Never rely on the jack alone. Give the car a firm push to ensure it is stable before getting underneath.
Step 3: Locate the Drain Plug
Find the drain plug at the lowest point of the oil pan. Check your manual if you're unsure, as the gearbox drain plug may be nearby. Position the drain pan directly underneath, slightly towards the direction the oil will flow when the plug is removed.
Step 4: Remove the Drain Plug
Wear gloves and loosen the drain plug anticlockwise using a socket wrench. Once loose, remove it by hand and move away quickly as the oil will flow immediately. Let it drain for 5–10 minutes until it becomes a slow drip. Check the plug and washer for damage.
Step 5: Reinstall the Drain Plug
Fit a new washer or crush gasket before reinstalling the plug. Thread it by hand, then tighten it to the torque specified in your manual. Avoid overtightening, which can damage the oil pan threads, or undertightening, which can cause leaks.
Step 6: Replace the Oil Filter
Place a drain pan or rag beneath the filter and loosen it with a filter wrench. Make sure the old rubber gasket has been removed. Clean the mounting surface, coat the new filter gasket with fresh oil, then screw it on by hand until snug.
Step 7: Add Fresh Oil
Lower the car before adding oil. Open the filler cap, place the funnel and pour in around 80% of the specified capacity. Use only the oil grade recommended in your manual. Pour steadily, then wait a couple of minutes for the oil to settle.
Step 8: Check the Oil Level
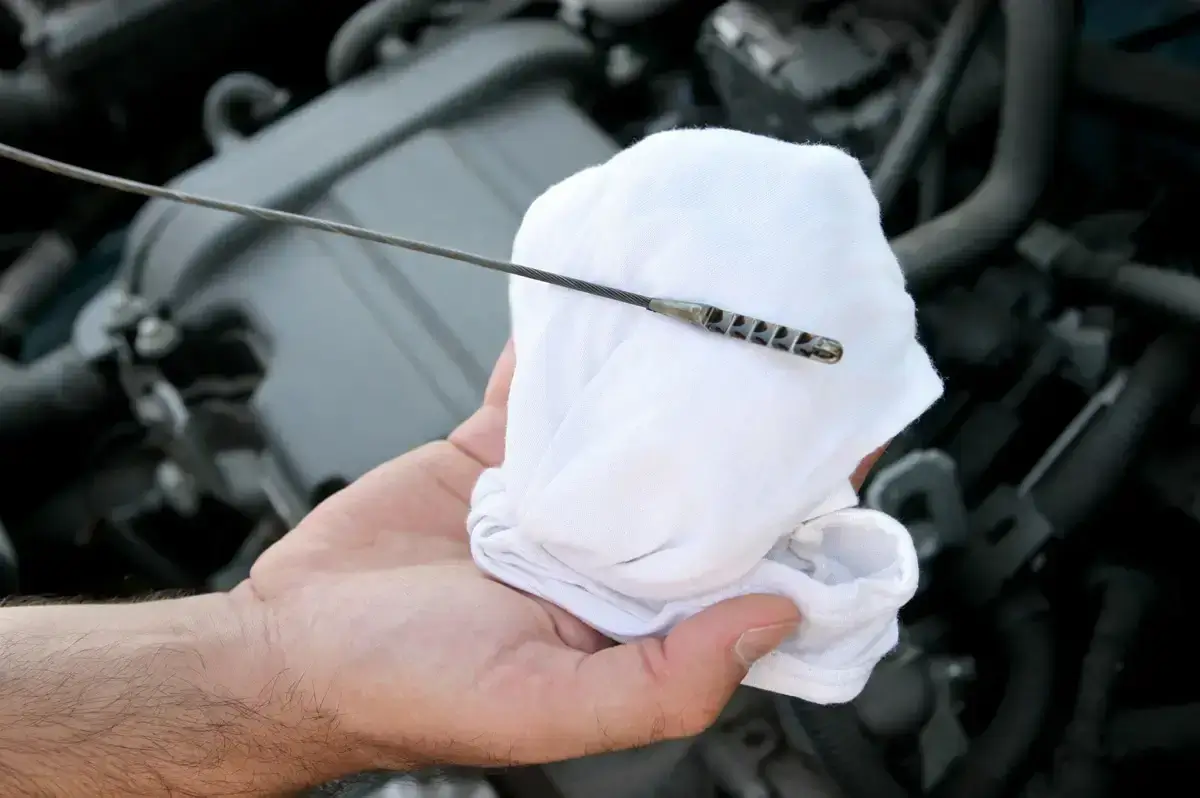
Pull out the dipstick, wipe it clean, reinsert it fully and check the level. Add oil in small amounts if needed, staying between the minimum and maximum marks. Start the engine for a minute, switch it off, wait five minutes and check again.
Step 9: Inspect for Leaks
Check the drain plug and oil filter for leaks while the engine is warm. Wipe both areas clean and inspect again after running the engine. Take a short drive, park and check underneath for fresh oil. Finally, record the date and odometer reading for your next car engine oil change.
💡 Tip:
Keep the old filter and the drained oil together in a sealed container. If a problem shows up later, the old filter's contents tell a mechanic what your engine was shedding; metal glitter in the filter media is a warning you'd otherwise never see.
How To Check Oil Level And Quality?
Park the dipstick back in, wipe it clean, then pull it out again. Check where the oil sits between the MIN and MAX markers. The oil should be golden to light amber. Dark brown or black oil means it is already overdue for a change. Gritty texture or a milky appearance signals deeper engine trouble worth investigating before you proceed.
Common Mistakes to Avoid During an Engine Oil Change
Using the wrong viscosity
Grade is set by your engine's bearing clearances and oil pump design, not by preference. Too thick and it won't reach the top end fast enough at cold start. Too thin and the film collapses under load at operating temperature. Match the manual exactly.
Overfilling
Excess oil gets whipped by the crankshaft and aerates. Aerated oil doesn't maintain a load-bearing film, so overfilling reduces protection rather than adding it. It also raises crankcase pressure and pushes oil past seals. Drain back to the correct mark.
Underfilling
The pump can draw air on cornering or hard braking, briefly starving the bearings. Low engine oil symptoms and effects cover what sustained running low actually does.
Skipping the oil filter
A used filter is loaded with everything it trapped over its service life. Fresh oil circulating through it picks that up immediately. The filter costs a fraction of the oil.
Reusing the drain plug washer
Crush washers are single-use by design. Reusing one is the most common source of the mystery drip that appears a week after a clean job.
Wrong drain plug torque
Overtightened strips alloy threads and means a new oil pan. Undertightened leaks. Use the manual's figure.
Fitting the filter with a wrench
Hand-tight plus three-quarters of a turn. A wrench over-compresses the gasket and can crack the housing.
Mixing incompatible oils
Different base oils and additive packages can interact and drop out of solution. Topping up with a different grade in an emergency is acceptable; running a permanent mix is not. See engine oil grades and classifications.
Skipping the leak check
Two minutes of looking at the plug and filter catches almost every failure this job can produce.
Maintenance Tips After an Oil Change
- Reset your oil change reminder if your car has one.
- Check for leaks under the vehicle within the first 24 hours.
- Log the date and mileage so your next change stays on schedule.
How to Dispose of Used Engine Oil Safely
Never pour used oil down the drain or into the soil. It contaminates groundwater and is illegal in most regions. Transfer it into a sealed container and drop it off at a local authorised recycling centre or service station. Many petrol stations accept used oil at no charge.
FAQs
The Finish Line
A regular car engine oil change is the simplest way to protect your engine's long-term health. Get the grade right, stick to the interval, and don't skip leak checks. Done consistently, it saves you from expensive repairs down the road. Prefer it done professionally?